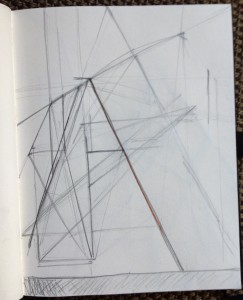
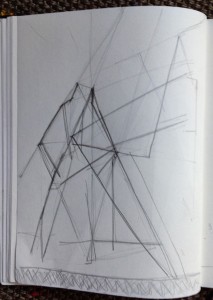
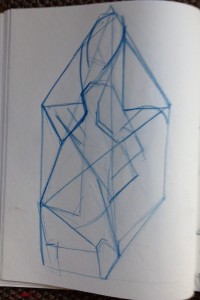
This series of sketching practices is intended as an exploration the painting’s underlying inner geometry, its own unique “grid”. The three approaches I am suggesting are alternative paths to the same destination, but it’s better to try all, or at least two of them: this will give you a better feeling of how this structure works. However, begin with the one which seems easiest for you, which seems to better fit the painting you are studying.
Here are a couple of preliminary questions which will help you to figure out where to start:
- Is there a complex shape (a human figure, a tree, a group of still life objects) which is the major focus of the composition (whereas the background is relatively simple)? If yes, it make sense to start with the “envelope drawing” practice.
- When you look at the painting, do you immediately see major lines that seem to belong to the picture plane as a whole (rather than to any individual “object” within it)? If yes, start with the “construction lines” sketching practice.
- If you answered “no” to both questions above, it’s probably better to start with the “geometric shapes” practice.
These are just suggestions — use your own intuition!
Note: The lines I will ask you to find need not coincide with the contours of figures or objects (for example, it may rather be a line separating the lit and the shadowed planes of the same object). They don’t need to be continuous, either: a line can be lost and then “found” again in another element of the painting. If three (or more) seemingly distinct elements of the painting seem to lie on the same straight line, this is also a good indication that the line can be important, even if it is completely invisible.
You might need to return to these practices on several days (letting the findings of previous days get absorbed and integrated by your brain and body). It will help you to refine your understanding and the overall “feel” of major shapes and construction lines.
Please avoid using any measurements — it’s better to make and then see and correct a mistake, or to try several alternative lines, then to get a line “perfectly” with the help of a ruler. Use an eraser if you need to. Start with light lines, so you can make corrections easily.
All illustrations below are from my own sketchbook: studies of Rembrandt’s “The return of the prodigal son”.
Construction lines
For “construction lines” studies, use your sketchbook and a 1B or 2B pencil. You can use an eraser if you wish. You will need rectangular areas of the same format (height : width ratio) as the original. If your sketchbook happens to have the same format as the original, all the better; if not, you will have to draw the outer edges; it’s better to darken the margins you won’t be using — by hatching them with your pencil, or by painting them over (whatever seems more convenient to you: the goal is just that your eyes aren’t confused by the edges of the page while you are sketching). (In my example, the lower margin of a page is hatched to create a drawing area of the right format).
Find and draw major vertical and horizontal lines of the painting (there will be just a few of them, if any).
 Draw them all across the area of your sketch, from one edge to another, even if the lines aren’t fully visible in the painting. Check whether the divisions of the picture plane introduced by your lines are the same as in the original painting (it’s easier to see the proportions looking at how your lines divided the edges, not the picture plane as a whole). What do you notice about these divisions, about the relative size of the rectangular areas they create? Are there any squares? Any “thirds”? Are the areas similar in size or, on the contrary, very different?
If you don’t see any major horizontals or verticals, start with diagonals: find the most prominent ones — no more then five-six.
If a diagonal in the painting doesn’t go all the way to the edge of picture plane, continue it in your imagination. Where does this (real or imaginary) line meet the edges? Now draw vertical and/or horizontal lines from the points where your diagonals meet the edges of the picture plane. Do they coincide with those you found in the first place? Are there any other prominent elements (“events”) of the painting “happening” on these lines? (This is particularly important if you haven’t found any major verticals or diagonals).
The goal of this study is pure exploration — it is an enhanced way of looking at the painting with “artist’s eye”. It needn’t be perfect, or even intelligible to anyone but yourself (see my study of “The return of the prodigal son” above).
Geometric shapes
For these sketches, also use your sketchbook and begin with drawing a rectangular area of the right format (see notes in the “construction lines” section).
 Look for simple geometrical shapes in the painting, united by colour or tonal value: rectangles, triangles, circles (you may have detected some of them when you did your “envelope drawings”, if that’s where you started). One shape can enclose several objects (or figures).
In your imagination, continue each boundary of the shape you have found till it crosses the edges of the picture plane. Find these “crossing points” on the edges of your sketch, and draw the line all the way — this is the easiest way to “locate” the shape within the picture area correctly.
Repeat this with every major shape you have found.
Pay attention to how these shapes relate to the major construction lines (if you have found them; if not, look for them now: some boundaries of the shapes you have found now probably constitute the construction lines).
Envelope drawing
This practice will be helpful if the painting you are studying focuses on a complex shape (the most obvious example is a human figure, but it can also be a group of still life objects, or a tree, or a complex land formation). As with previous practices, the goal of this exercise is to help you see the simplified abstract geometric structure created by the master to integrate the figure into the picture plane (it is adjusted from Barry John Raybould’s “Virtual Art Academy” course).
This exercise can be done either in your sketchbook or on larger sheets of newsprint, or both. Start with the size that feels most comfortable, must suited to your natural arm movement. Alternatively, you can start with smaller drawings in your sketchbook — but if your final painting is going to be relatively large, it will be helpful to use this practice to train your hand-eye coordination for larger sizes.
An “envelope” is a geometrical shape, composed of straight lines only, which fully encloses the complex shape you are studying.
 As a first step, try to find a simple geometric figure with three to six vertices which would serve as an envelope for the shape you are studying. It will be helpful to find three-six points where the outer contour has a major change of direction (such as, for example, a shoulder, or a foot) and draw straight lines which would touch the figure at these points (but never intersect with it).
Of course, you are drawing on your own paper — not on the reproduction, so an important task here is to identify the relative positions of these points, and the slants of all the straight lines as accurately as possible. If you make a mistake, you will see it — if not right away, then at the later stage of the exercise. If this happens (and most likely, it will more than once), just start again.
The next step is to break each line into two to create a more complex and refined “envelope”. See where you can “cut off” an angle of your envelope, so that it would still fully enclose the figure — there will be several alternative solutions, but try to look for one that matches the figure more closely. Pay attention to whether (and how) the lines of your envelope may be “picked up” by some prominent lines within the figure — if that happens, it means you are probably “on the right track” to uncovering the underlying structure of the painting.
Refine your envelope several more times: the shape will get more complicated in the process, but it will help you see whether your first attempt to uncover its underlying abstract structure was close to what the master had in mind.
Each single envelope drawing should take no more than fifteen minutes, but you will probably need several of them to get the feel and understanding of the structure. It will be a good idea to stop after two or three sketches, and return to this practice next day (or in a couple of days) — sleep on it, let your brain work on it “in the background”.
This post is a part of online program, “The Making of a Painting Masterpiece”.